Welcome to these web pages describing my upgrade projects to a Skywatcher EQ2 GEM. I hope you find the info and constructional details published here useful for your own astronomy projects. If you want to get in touch, you can email me from the Contact page.
First off, why bother ? I was looking to put together a (aeroplane) portable camera platform kit for imaging the sky at focal length ranges of 5mm to 500mm. I also wanted to move my observatory out of the garden and onto the roof of the house – too much mud in winter, too many midges in summer, too many trees at ground level, and the odd rat and fox.
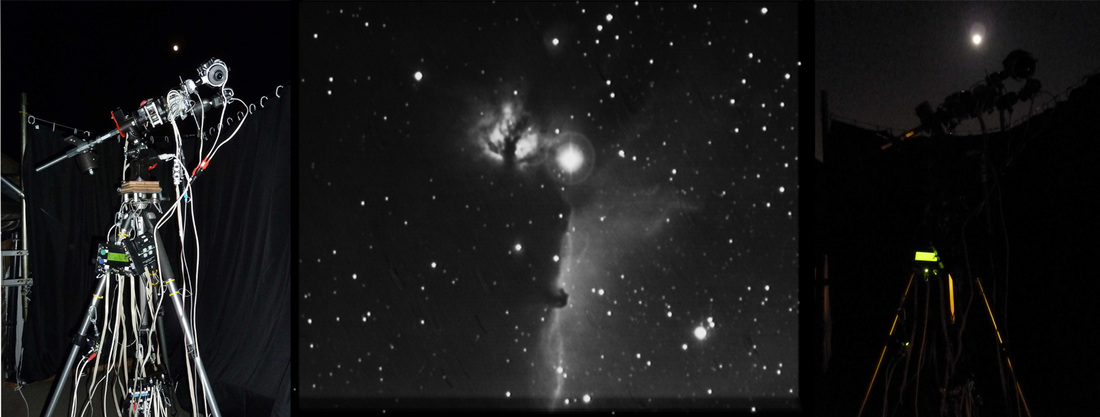
The roof location required a much less heavy setup. Targets are wide field views like comets and the Milky Way, to deep sky objects like the Messier catalogue. The image sensors are video or webcam based CCDs of small size – 1/4 or 1/3inch. Because I live in a light polluted city, I would like to use narrow band filters to punch through the skyglow, so the ability to track accurately for tens of minutes is needed.
Why start with an EQ2 ? Well, it is cheap (and nasty, some might say). A lot of my improvement projects tend to morph into ‘modified to destruction projects’, so it is better that the skin in the game is mainly time and effort, rather than lots of expensive kit. Who wants to drill holes in a £1,000 top of the range GEM ? I thought about making a motor driven barn door mount, but realised it would end up being quite heavy and massive to carry the cameras, OTAs and lenses.
Other pluses of the EQ2 are:
· Light in weight and small
· Mechanically simple to dismantle, adjust and modify
· No plastic parts of any importance, metalwork can be easily machined
· Free swinging axes with clamp clutches
The biggest issue with the EQ2 is general wobbles. The shafts are skinny – 10mm and 12mm, and the bearing surfaces are small. The factory assembly is careless and a bit of judicious adjustment of the various nuts and grub screws works wonders. The box section aluminium tripod looks chunky but it isn’t, and introduces a lot of flex all by itself. The axes clutches are simple flat-ended screws bearing onto shaft surfaces and will not bear much torque without
slipping. If the clutches are holding any torque they act as springs, so the EQ2 has to be balanced in both axes. Properly setup and out of the wind, the EQ2 can be made nicely damped, fine for our purposes. The great thing about imaging is that humans don’t have to be anywhere near the setup while the real business is going on – which removes the biggest source of vibration at a stroke.
The other big EQ2 issue is the fine adjustment on the DEC axis – it is a sprung tangent arm arrangement giving about +/- 10 degrees adjustment, rather than a 360 degree worm. Provided you lock onto your target with the DEC fine adjuster around the middle of its range, this amount of fine movement is more than adequate to adjust for any reasonable polar misalignment and tracking error. All that is needed is to motorise the adjuster for auto-guiding and off we go. Simples !
The project started October 2012, more or less at the start of the cloudiest winter I can remember in London, England. Without the distraction of any real night-time astronomy progress has been rapid. As of May 2013 here is the backlog list of mods that are worth putting up here – the ones with an asterisk are here, the others are on the to-do list.
EQ2 upgrades and modifications:
First off, why bother ? I was looking to put together a (aeroplane) portable camera platform kit for imaging the sky at focal length ranges of 5mm to 500mm. I also wanted to move my observatory out of the garden and onto the roof of the house – too much mud in winter, too many midges in summer, too many trees at ground level, and the odd rat and fox.
The roof location required a much less heavy setup. Targets are wide field views like comets and the Milky Way, to deep sky objects like the Messier catalogue. The image sensors are video or webcam based CCDs of small size – 1/4 or 1/3inch. Because I live in a light polluted city, I would like to use narrow band filters to punch through the skyglow, so the ability to track accurately for tens of minutes is needed.
Why start with an EQ2 ? Well, it is cheap (and nasty, some might say). A lot of my improvement projects tend to morph into ‘modified to destruction projects’, so it is better that the skin in the game is mainly time and effort, rather than lots of expensive kit. Who wants to drill holes in a £1,000 top of the range GEM ? I thought about making a motor driven barn door mount, but realised it would end up being quite heavy and massive to carry the cameras, OTAs and lenses.
Other pluses of the EQ2 are:
· Light in weight and small
· Mechanically simple to dismantle, adjust and modify
· No plastic parts of any importance, metalwork can be easily machined
· Free swinging axes with clamp clutches
The biggest issue with the EQ2 is general wobbles. The shafts are skinny – 10mm and 12mm, and the bearing surfaces are small. The factory assembly is careless and a bit of judicious adjustment of the various nuts and grub screws works wonders. The box section aluminium tripod looks chunky but it isn’t, and introduces a lot of flex all by itself. The axes clutches are simple flat-ended screws bearing onto shaft surfaces and will not bear much torque without
slipping. If the clutches are holding any torque they act as springs, so the EQ2 has to be balanced in both axes. Properly setup and out of the wind, the EQ2 can be made nicely damped, fine for our purposes. The great thing about imaging is that humans don’t have to be anywhere near the setup while the real business is going on – which removes the biggest source of vibration at a stroke.
The other big EQ2 issue is the fine adjustment on the DEC axis – it is a sprung tangent arm arrangement giving about +/- 10 degrees adjustment, rather than a 360 degree worm. Provided you lock onto your target with the DEC fine adjuster around the middle of its range, this amount of fine movement is more than adequate to adjust for any reasonable polar misalignment and tracking error. All that is needed is to motorise the adjuster for auto-guiding and off we go. Simples !
The project started October 2012, more or less at the start of the cloudiest winter I can remember in London, England. Without the distraction of any real night-time astronomy progress has been rapid. As of May 2013 here is the backlog list of mods that are worth putting up here – the ones with an asterisk are here, the others are on the to-do list.
EQ2 upgrades and modifications:
- *RA and DEC drive corrector for autoguiding
- *RA and DEC axis encoders and digital setting circles (software v1)
- *Polar alignment using an SDC 435 integrating video camera or webcam
- *Adapter to fit EQ2 to Manfrotto 055CL tripod
- EQ2 GEM dismantle, strip down, adjust and re-assembly
- Replacement DEC shaft extension and counterweight system
- Sagging RA motor – new RA motor spring attachment plate
- Modified EQ2 head plate for camera screws and Manfrotto 625 quick release adapter
- Regulated 6V battery replacement power supply
- Slow motion motor drive for DEC axis
